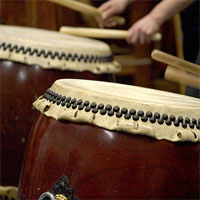
No modern action score is complete without a rousing percussion section hammering away beneath the rest of the instruments. Yet despite being one of the most important elements in the score, many media composers take the easy way out with their percussion, resorting to some tired loops.
If you’re sick of sounding like everyone else and have run out of ways to layer your loops over each other to sound “fresh”, then keep reading as I give you a quick look at what it takes to program your own percussion, why it’s not as hard as you think, and why it’s crucial for defining your own personal sound.
I Hit It With A Stick
Percussion instruments come in many shapes and sizes, and can be made of just about any material you can name. In fact, when you think about it, anything at all can become a percussion instrument: just whack it! There are, of course, a number of “standard” instruments (like snare drums, congas, taiko drums, etc.) that are encountered in most cases, but never be afraid to think outside the box a bit when you’re working — especially with percussion — because you can get some amazing sounds out of the most unexpected sources.
But for the purposes of this tutorial, we’re going to stick to some pretty basic percussion instruments. The idea is to teach you one approach to working with your percussion samples so that you can then take the techniques and apply them to any project and any percussion instrument you care to get or make.
1. Laying the Foundations
We’re going to create a short percussion phrase. It could easily be made to loop, but for now let’s not worry about looping and just think of it as a stinger for something. Once we’ve got a tempo in mind, we can start building from the ground up.
The ground, in this case, is the steadiest element. It is not necessarily the lowest in pitch, it’s just the element that remains fairly static and can be easily followed when we start adding layers. Since it’s most often the case, we’ll use a large drum (doesn’t matter what) to lay down our “bottom” layer:
Now we have something to work with. It’s a steady rhythm, with no major changes or complicated intricacies. Just a steady pulse. But note that even this most simplistic element still has dynamic range: some hits are louder than others, and there is a sense of phrasing throughout the clip. In other words, it doesn’t just sound like the same sample over and over and over like a poor techno beat.
2. Livening it Up
Now unless the scene calls for very basic accompaniment, we’re going to need to jazz up this stinger a bit. Since we have a foundation, the rest is fairly easy — it’s just a matter of adding layers. The trick is to be tasteful about it, to keep it balanced, and to do your best to think like a percussionist and write in lines that are intuitive.
Since we’ve got the low drum going, I’m going to take a mid-ranged drum to fill out a bit more of the spectrum. The line I’m adding in is more active and fairly constant throughout the clip, though it does build to the end — again, remember to have dynamic range in there because that’s a large part of what will keep your percussion sounding real and alive instead of flat and loop-y:
Notice that we’ve already got something that sounds very useable. Keep in mind what I said about being tasteful: if you’ve got enough going on to address the scene, then stop. Overcomplicated percussion is distracting and will divert your audience’s attention if not handled properly, so be wary of that. Of course, if that’s not the case, then there’s a lot of room up top for some spice…
3. Up High
With a solid low and middle end going, we’re ready to set our sights higher up. For this next layer, I’m taking some smaller percussion instruments. This upper range is the realm of hi-hat hits, cymbals, shakers, stick clacks, bells, and other high-pitched sounds.
With this layer, I’m going to break things up a bit in two ways: first of all, I’m going to add two different elements this time and one of them isn’t even going to show up until the second half of the phrase. Secondly, I’m going to have that second element play a part in triplets rather than in straight time. This adds just a bit of instability to the rhythm and gives a sense of extra momentum, propelling us forward.
By the way, I’m adding these layers via MIDI keyboard, but you can use any entry method that suits you so long as you do your best to keep things sounding natural. The advantage of playing things in rather than notating them in or drawing them on the piano roll is that you can actually “perform” them and save yourself hours of tedious MIDI fiddling. Just do a couple of takes until it sounds natural and you’re good to go!
Here’s the segment with those two elements added in:
Now we’ve got an oriental feel happening with those bell-like instruments in the second half, and the blood is definitely starting to pump.
4. Taiko
The workhorse of the film percussion palette is the Japanese taiko drum family. These mighty instruments have become quintessentially Hollywood and their beefy sound and crisp character make them an invaluable part of your percussion mix. For us, they’re going to lend a helping hand to our lonely foundation line because it could use some extra bass support. In addition, I’m going to toss in some stick clacks — another familiar sound.
The results are immediately evident:
With this, we can call it quits: we’ve got a very useable and very rich percussive segment. Best of all, it’s completely unique and has not appeared in 500 other shows scored by all the other composers using that same library of loops. This is all you.
5. Polish
On the other hand, since scores tend to call for some added aggression these days, we may have to do one more pass. We’ve kept very much to organic instruments thus far, so for this last round I’m going to throw in some heavily distorted hits to get things sounding angrier. Again, remember to be tasteful about it. I’m not going overboard with them, just enough to pack an extra punch.
In addition, I’m feeling like that shaker is now too loud with all these other things going on, so I’m going to bring its volume down. I’m also going to add some gentle tail reverb to everything to tie all these disparate elements together.
The results are appropriately menacing:
Cool.
Parting Thoughts
If nothing else, take away from this tutorial the idea that your percussion is an instrumental section just like any other that you write for. The moment you disregard it and just toss a loop on is the moment you’re compromising the craft. It’s harsh and sometimes deadlines require the use of loops, but even then do yourselves a favour and toss a couple of quick lines overtop of the loop to give them a personal touch. Remember though that the biggest advantage of writing your own percussion material is that you can tailor it to fit your needs precisely. No more worrying about splicing loops.
Also worth mentioning is that you can cover a lot of different ground with just one set of instruments. For instance, here are two more quick phrases I’ve thrown together using the same percussion instruments (just 5) we used for the above tutorial. The first is more laid back and unaggressive:
And the second is brisk and sharp:
The reality is that spending the time writing out your own percussion lines is a time-consuming prospect, but for anyone who’s serious about carving out their own niche and establishing themselves as a composer with a unique voice and creative drive, it’s just another essential piece of the puzzle.


