This tutorial is mainly about how to make your drum track sound more punchy and present it in the mix without losing a lot of dynamics. It is not about mixing single tracks of a multi track drum recording. Assuming that your drum sound is fine but somehow it gets lost in the final mix. Apparently, one option is to increase the volume but usually this will only affect the balance of your arrangement so be aware of that.
Normally, you would want to use a compressor on your drum track to catch the very loud peaks. But be careful in doing so because if you go too far with this effect you are only going to lose a lot of your dynamic range. Consequently, the sound might become inappropriate for your production. So I am going to share with you a little trick that retains the dynamic range but adds more punch to the sound. This applies to recordings of real drums and virtual instruments.
2 basic ways to affect/edit your drum sound
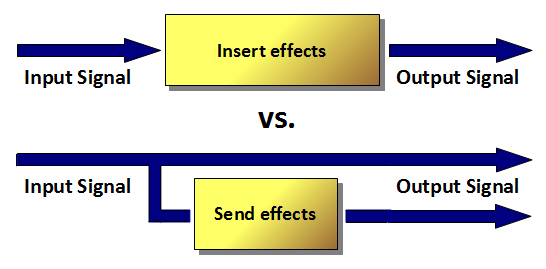
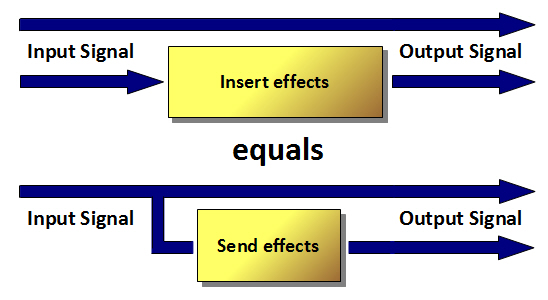
Basically there are two ways to edit an audio track in general. The first one uses insert effects while the second one uses send effects. Both ways bring their specific advantages into play. Insert effects affect the whole signal that runs through the audio track. On the other hand, send effects affect a copy of the audio material without touching the original signal. That means, the affected audio data is added or returned to the original audio data.
One big advantage of send effects is that you are able to send different signals from various audio tracks to the bus without increasing the CPU workload. But nowadays the CPU is not the bottleneck anymore, neither is RAM. Clearly, it becomes a matter of personal choice and what fits your workflow best.
Note: You can use a send bus as a substitute by duplicating an audio track and using insert effects on one of these tracks only. With the right portion of volume, you can set up a balance between both tracks.
I prefer using send effects in most situations because you can glue your instruments together by using typical effects on send busses like delay or reverb. In this way, you have to set up the effect only once and theoretically you can use it on every audio track in your project.
Adding brightness and punch
In setting up two separate send busses, I can add some brightness or give more punch to the drums. The architecture of send busses are (usually) identical throughout different DAWs no matter which DAW you are using.
Note: The drums I use in my sample are already processed using EQs, compressors and gates. I usually do the mixing process of the drum set first to create a good and solid basis to add further spicy effects. So I (personally) do not consider the send busses being a part of the ordinary mixing process. But (as always) that is a personal point of view.
Brightness: All effects listed and described in this paragraph are used as an insert effect on the first send bus.
- First, since we want to edit the high frequencies only we need to set up a HPF (high pass filter) at around 3.1k Hz.
- The next effect in the chain is a short ambience reverb (reverb time: approx. 0.5 ms; using 100 % wet on the output).
- Finally, use a chorus at the end of the chain for some frequency modulation. This prevents the signal from phasing when it returns to the original audio track. I recommend that you check out some different settings to address your specific needs. Nevertheless, there are no rules.
Please listen to Example 1. It automatically starts with the original drum track. Then, after a few bars add the brightness send bus and switch it on and off every few seconds. While listening to the sample, focus on the hihat and the snare drum (also the overheads) since this is the frequency area where the effect works.
Example 1
Punch: This is a very simple and commonly used trick in rock/pop audio productions. But it is as simple as effective. Therefore, make sure you have it at your disposal. Simply create a new send bus and use a compressor (try a short attack time and a very high ratio) on this track as an insert effect. I prefer to use the 1176SE for that purpose. The trick is to really compress almost the whole dynamic range out of the drums! As you can see I’m using the ratio in “all mode” and at a very high input level.
Listen to Example 2. Again, I am switching between the original track and another version with the punch send bus mixed in every few seconds. Obviously, the second version is a bit louder because of the added signal from the send bus. You might tend to like this version better because of the loudness, but the loudness is not the point in this case. I really want you to focus on the punch and aggressiveness.
Example 2
Summary
Finding the right balance between the original audio signal and the returned signal from the send busses is your discretion. There are no specific guidelines except: What sounds good is good!
Let us see how our drum set sounds like with and without both send busses. Again, I’m switching the sends on and off every few seconds. You can listen to that comparison in Example 3.
Example 3
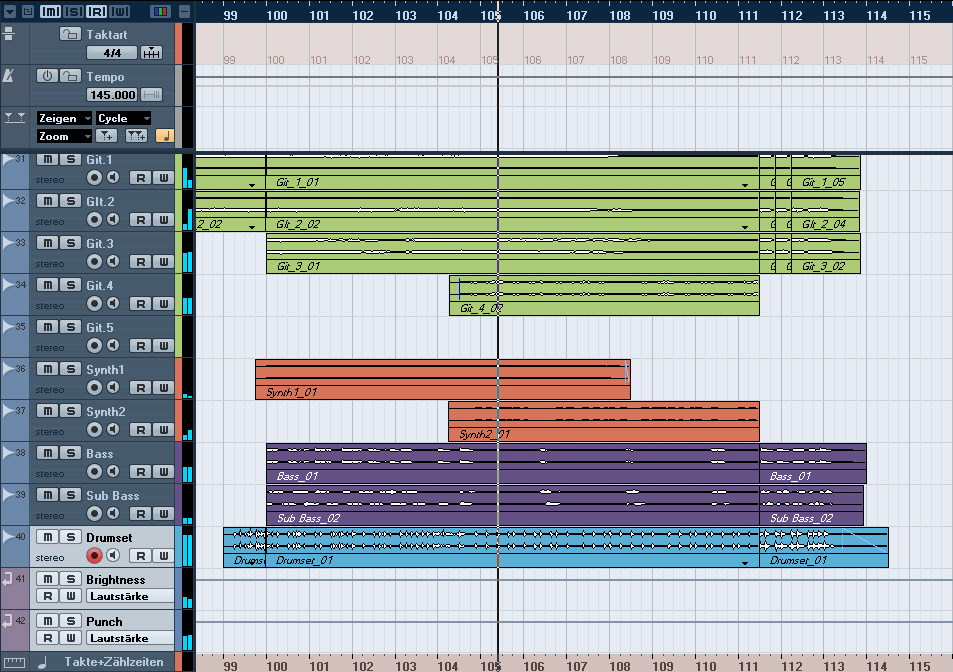
Last but not least, I would like to show you the drum track in context. I did two mixdowns of the whole session to show you an A/B comparison of what it sounds like with and without the support of the send busses on the drum track (listen to Example 4). See how the send busses help the drum track come out on top?
Example 4
Note: As you might have guessed I am not using the send busses on the drum track exclusively. Like what I have mentioned before, it is also a stylistic device to put different instruments all together (similar to reverb). That means, I am using them on almost every audio track in my session (with different amounts). This naturally results in a smoother overall mix because of a similar sonic behavior in various instruments.


